Showing posts with label Tutorial. Show all posts

Wednesday, March 12, 2014

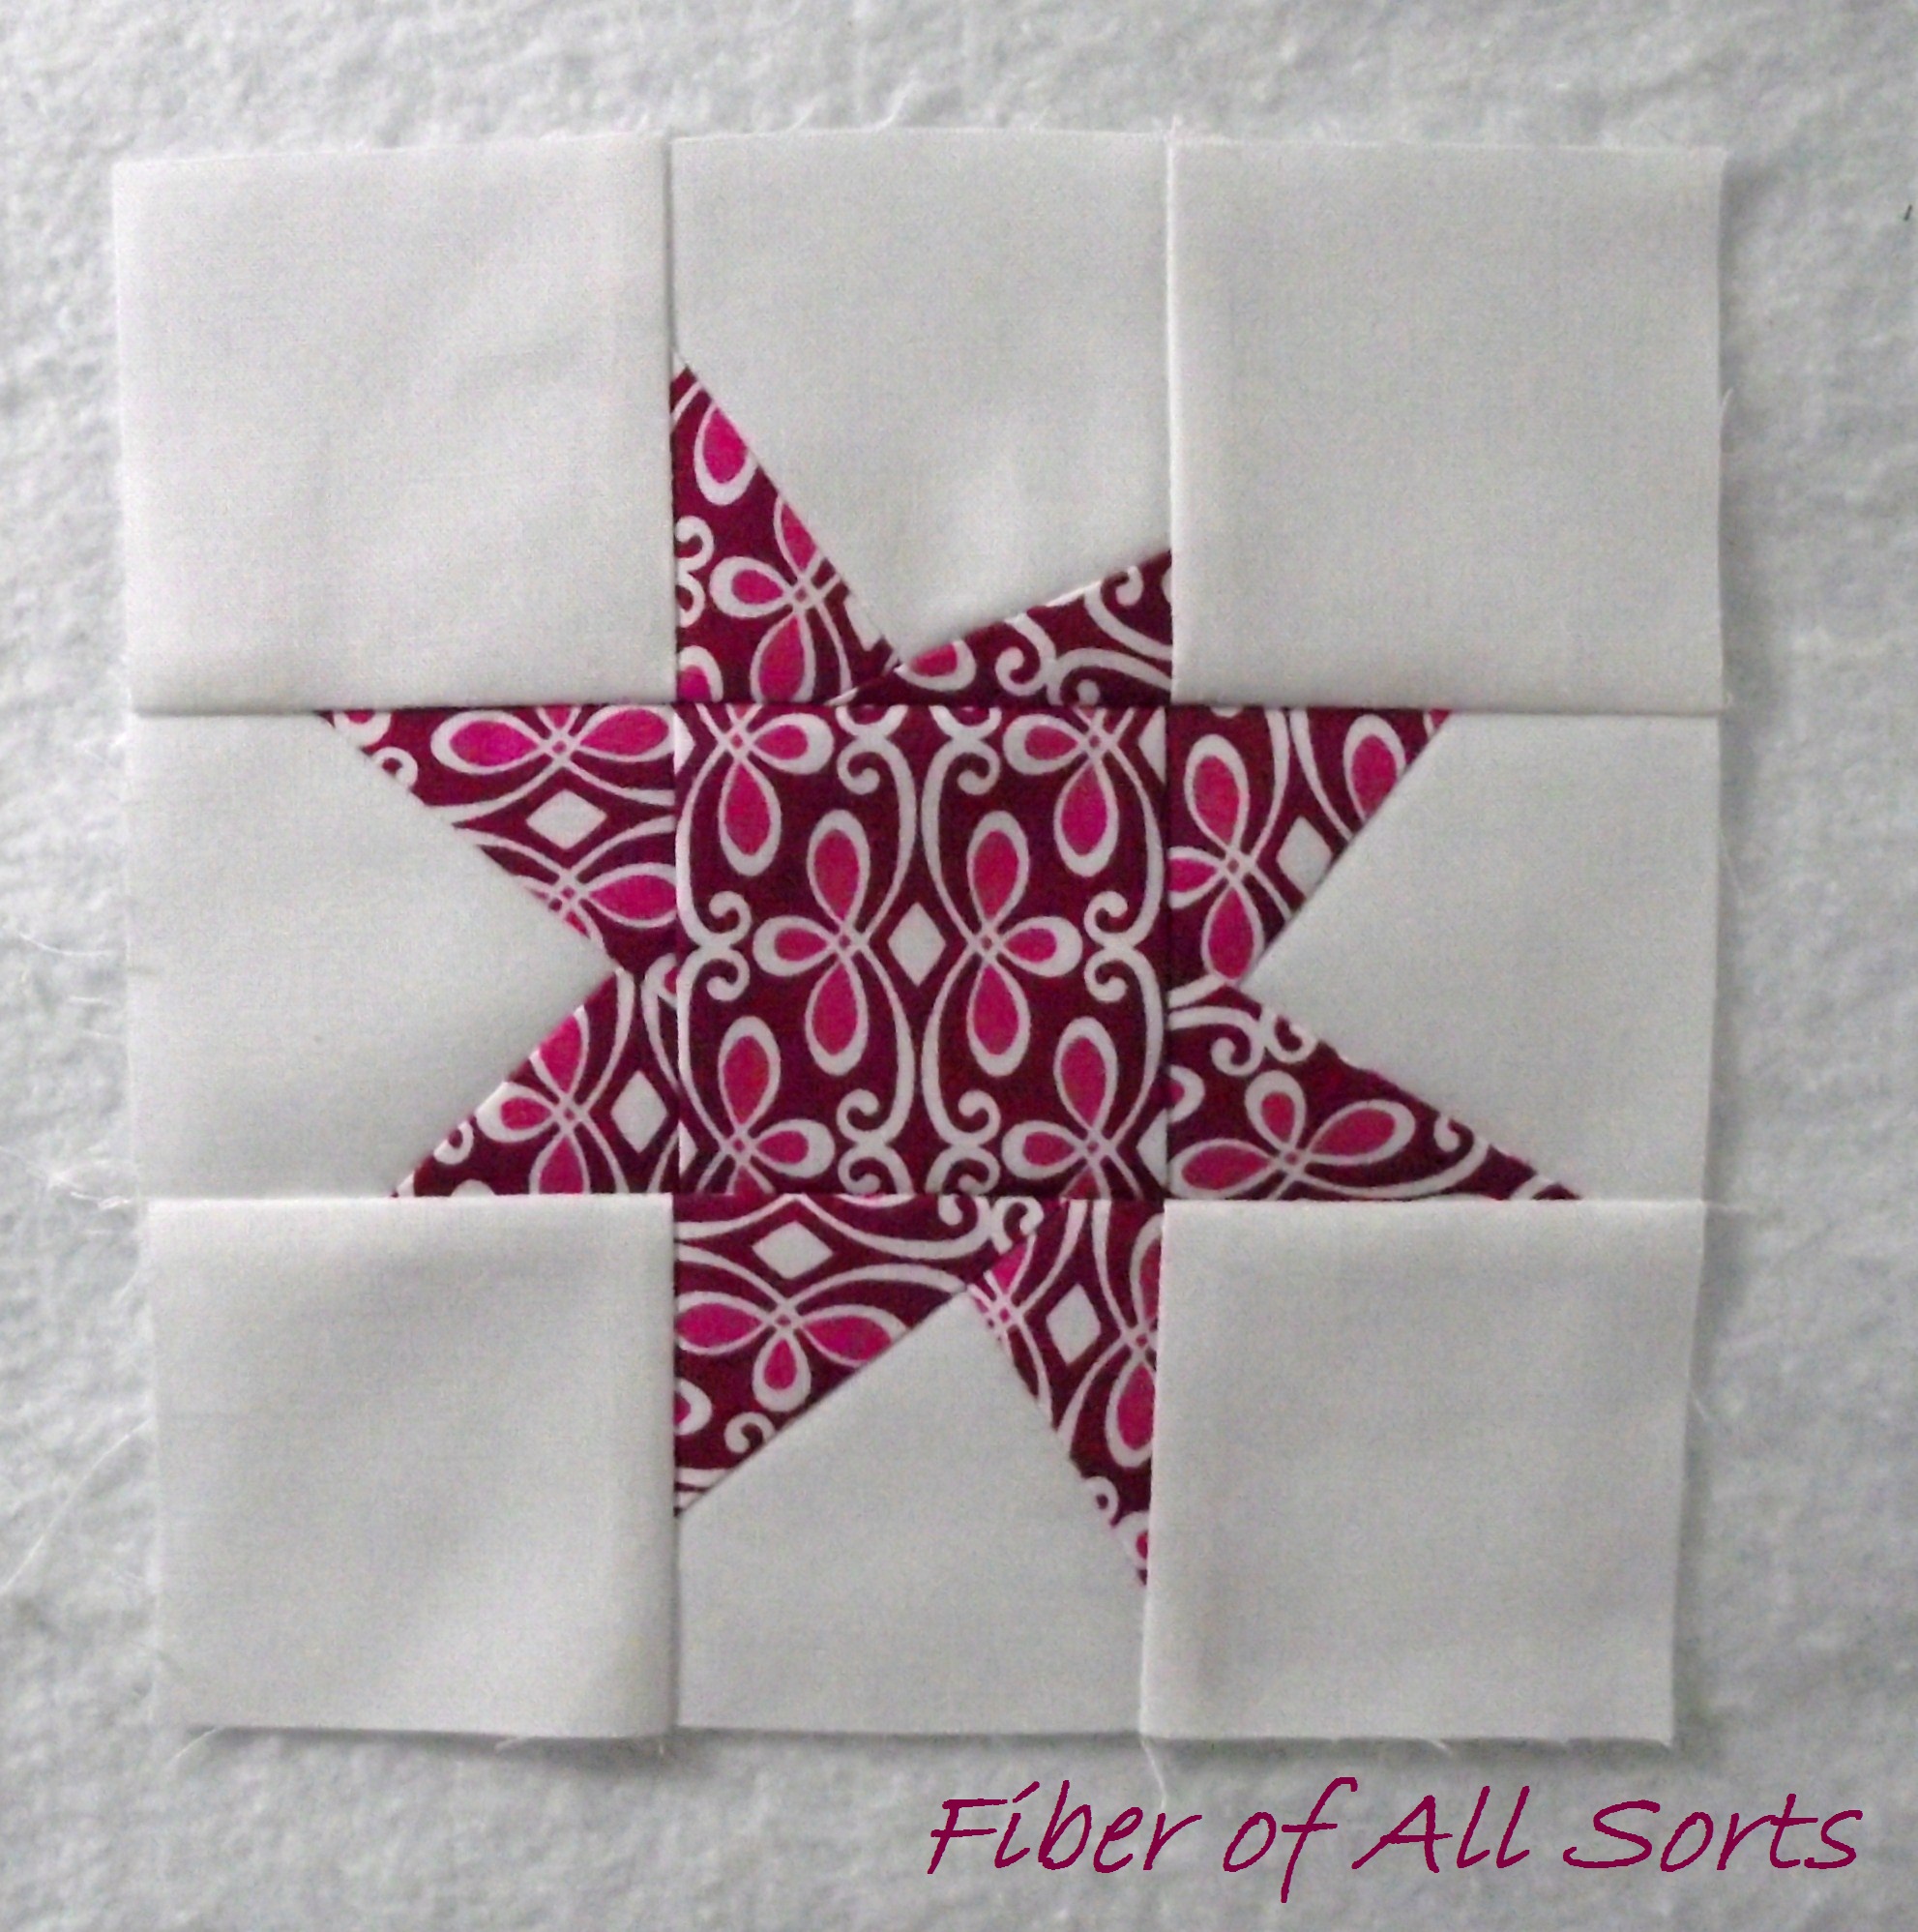
A Blooming Marvelous Star - Tutorial

Super excited to share a tutorial I created for


Presenting A Blooming Marvelous Star


I am sharing this tutorial over on Inspired by Fabric 

There is a whole blog hop going on.  And a giveaway!

I was sent some fabulous Ro Gregg's Marblehead Venetian Glass fabrics which is awesomely inspired by travels.

This was super fun to create.  
Find my tutorial HERE

So excited to try something different on such a (to me) traditional block.

This is one of my tester blocks..

#crazytwistedquilters #tulapink A star to start me out.

Cute ey?

How about this beauty

A Blooming Marvelous Star with tutorial on my blog

Thanks to Katy from The Littlest Thistle for help with the name.  She just seems to see into blocks nature...right?

Would love to see any photos of stars you create with my tutorial.


Wednesday, July 3, 2013

How to sharing from the "new" flickr - mini-tutorial

So many changes!

So the google reader is gone.
People are being polite and calling it retirement.
GRRR - Google overlords

And Flickr just had to change things up.
People again are being polite - sigh.
GRRR - Flickr overlords

But what to do is to find the "new" ways to do what I was so used to do.

How do you grab or share the photos you've loaded? 

It's moved from a the top of the photo that was labeled to an icon below the photo.


Find that icon that is a little box is with an arrow coming out of it pointing to the right.

You have a few options here.

So for example, to join the the #ALYoF linky party, you can go to "grab a link" by coping & pasting the web address in the box..

This is what you can use to join the linky party with Melissa's tutorial.


You still have the option to grab the HTML to enter into posts.
{Make sure to grab all of that garblely goop in that box}
And be sure to be in HTML mode in your post creation. 

I'm going to point you to the two posts that Melissa and I created:  
Add a button to your blog post - Blogger & Wordpress


This will be added to the tutorials for A Lovely Year of Finishes with me here or with Melissa here

A Lovely Year of Finishes
All these changes keep me on my toes for sure!

Let me know if this helps.


Thursday, February 28, 2013

My Favorite Quilt Block - Wonky Star

PhotobucketWelcome to my little part of the crafty blog world. 

I'm super excited to be a part of 'My Favorite Block Quilt Along'. The awesome host, Kim, has short interview with me over at  Persimmon Dreams.
Trying to choose one favorite quilt block proved to be harder than I anticipated.  I finally landed on the Wonky Star. 

My personality leans towards straight, symmetrical, and perfect blocks but this layout gets me to step out of my comfort zone and create something on the fly!  All in all, this block is good for me.

Here's my little tutorial :)

Wonky Star
Wonky Star - Tutorial

Materials:

Wonky Star - materials
For a 12” finished block (12.5” unfinished block)
Cut 8 – 4.5” x 4.5” background fabric(s)
Cut 1 – 4.5” x 4.5” center fabric
Cut 4 - 4.5” x 4.5” star point fabric(s) *
For a 6” finished block (6.5” unfinished block)
Cut 8 – 2.5” x 2.5” background fabric(s)
Cut 1 – 2.5” x 2.5” center fabric
Cut 4 - 2.5” x 2.5” star point fabric(s) *
*If you want a little extra leeway make these 0.5” larger (especially on the smaller blocks)
Wonky Star - inital layout
Above photo is for reference. This is the layout of the all your pieces, with the star point fabrics on the outside of the background fabrics they will be sewed on
Construction:

1/4" seams throughout
1. Cut your 4 star point fabrics and cut them in half.

Wonky Star - star point cutting

2. On one background fabric place one star point.  I usually test how wonky I want my points to be. Make sure the star point fabric covers the background fabric.  The background fabric is your reference.
Wonky Star - first point layout

Below is what NOT to do.  This is easy to do on the smaller blocks so check, check, and double check.
Wonky Star - don't do thisWonky Star - don't do this result

3. Sew, trim background fabric, press.
Wonky Star trimming background fabric

4. Repeat for 2nd star point. Sew, trim background fabric, press.

Wonky Star - second point layoutWonky Star - second point sew line

5. Now trim block to original background size (on all sides).
Wonky Star Triming to size

6. Repeat steps 2 – 5 for all four star points.
7. Assemble your 9-patch.
Wonky Star 9-patch layout

Suggestions on pressing: I’m a press to the side kind of gal because I feel it gives more stability in the finished product and my mother taught me to do this. I do highly suggest nesting your seams.  I’ve added a photo as examples of how I’ve put together my blocks. 

Nesting seams


Finished blocks:

                12.5” unfinished block                                                  

Wonky Star - 12.5"


6.5” unfinished block
Wonky Star - 6.5"


Other examples of wonky stars I’ve made:
You can mix it up with tons of combinations of background, star, and center points.  I love gathering my inner wonk!

June - Aqua and RedSew Swap Share - Feb 2013 ~ Front

Sting Wonky Star 

This beauty was entirely from scraps.  I starched each piece and cut 1" strips and went to town.  The seams are bulky but - ohhhh soo cute!


So for a handy reference, you can download this tutorial available here.

Remember to check out the other 20 designers over at Persimon Dreams main page for this QAL. Make sure to check out Karen over at Little Birdie Quilting with her fantastic strippy leaf block from Tuesday - it's fantastic!

Oh and there's a super active flickr group where you can find some great color choices.

I can't wait to see what people make.
~~~

Thanks for stopping by!  Please feel free to check out my other blog posts. And a monthly linky party, hosted by Melissa of Sew BitterSweet Designs and myself,  'A Lovely Year of Finishes' where you finish up your projects and you can enter to win prizes.


Wednesday, January 30, 2013

New Leaf - Bee Block Blog Hop ~ Building Foundations

How super exciting to be asked to help with the new line 'A New Leaf' an organic line by Daisy Janie.


New Leaf fabrics is they are100% GOTS Certified organic fabrics {you can read more about this here}. 

I have to tell you I've instantly fell in love with this line with the colors but ohhh baby it feels like a cloud.  Wait didn't I already gush about this over here?  Why yes I did.

The blogs that were asked to make blocks had a theme to work from ~ New Leaf
These fabrics helped me for sure.  I wanted to have triangles {as I love them} but also blocks that represent how I've been growing.  It takes a lot for me to learn before I think I can get to the next level. 
And the reality is that where you end up is not always where you wanted to get when you started.  And sometimes it's not perfect but it's still and awesome ride on the way there. 

I wanted to share my block I'm calling Building Foundations
This tutorial creates a block
unfinished 12" x 12"
finished 11.5" x 11.5"


Materials:

7 pieces of the lovely New Leaf.  I worked from a fat 8th bundle. These do trim down but as you'll see there is some flexibility in the placement.


Cutting:

Top Flying Geese:
Center:  1 ~ 3.75" x 7" 
Edges: 2 ~  3.75" x 7" {general length}
Middle Flying Geese:
Center:  1 ~ 4.5" x 8.5"
Edges: 2 ~  4.5" x 7" {general length}
Bottom Flying Geese: 

Center:  1 ~ 4.75" x 9" 
Edges: 2 ~  4.75" x 7" {general length}


Construction:

We're making flying geese - with long tails.

The tails point down.  This will give you the length.

I eyeballed the marking of each block as shown below.  

You sew on the line, trim and repeat.


This is where you get to be unique and place these as where ever you choose.  I personally didn't want these to line up straight ~ but it's your choice.

Trim to 12" square and ta-da!


I want to point out to you to the other fantastic people in this blog hop.  Here is a line up of the folks in-case you missed them.

New Leaf Bee Block Blog Hop Schedule
Mon, 1/14 - Becky Moyer, My Fabric Obsession
Tues, 1/15 - Lynn Harris, The Little Red Hen
Wed, 1/16 - Candy Glendening, Candied Fabrics
Thurs, 1/17 - Holly DeGroot, Bijou Lovely
Fri, 1/18 - Melanie Thornton, Melanie Dramatic

Mon, 1/21 - Emily Cier, Carolina Patchworks
Tues, 1/22 - Rachael Gander, Imagine Gnats
Wed, 1/23 - Maureen Cracknell, Maureen Cracknell Handmade
Thurs, 1/24 - Leanne, She Can Quilt
Fri, 1/25 - Cindy Wiens, Live a Colorful Life

Mon 1/28 - Cheryl Arkison, Dining Room Empire
Tues, 1/29 - Jacquie Gering, Tallgrass Prairie Studio
Wed, 1/30 - Shanna Bailey, Fiber of All Sorts {you're here}
Thurs, 1/31 - Jan, Daisy Janie
Oh did you know there is a prize you can win?  It's a puzzle that involves all of us  :)  Go check out Daisy Janie's post here

The FQ Scramble letter is V


Thanks for stopping by and remember the February goal setting party for A Lovely Year of Finishes starts on the first and is open for seven days.  Start to pick your projects.

Sunday, December 30, 2012

Tutorial - Add my button to your blog post

While typing a new blog post you can add fancy items like buttons!

Like this one

A Lovely Year of Finishes

But ... HOW?
Other platforms is not included in this post. If you are working through WordPress Melissa over at Sew BitterSweet Designs has a tut for you.

#1. Find post with a "grab my button" box under it.  . . .

like this one

A Lovely Year of Finishes
<a href="http://fiberofallsorts.blogspot.com/p/lovely-year-of-finishes.html" title="A Lovely Year of Finishes"> <img src="https://blogger.googleusercontent.com/img/b/R29vZ2xl/AVvXsEhfvBE7uofUE15qEda8ii_lCUv9l9ajbjKBxw5xuQHlMIkMtwM_aDuyXvP350NArINiIsI944NN1d1nnvh4WUKQcPN01tr519Pg9cNPbImu-G1P-vihiQu88UZr7jpHTG7HCO5NHNnKSAj4/s400/2013btn600.gif" width="180" height="180" alt="A Lovely Year of Finishes" style="border:none;" /></a>


Now you have to highlight ALL the text in the box.  Sometimes it's difficult but just copy all of it. I usually use the keyboard shortcuts Ctrl-C. 


#2. Now for the fancy part.

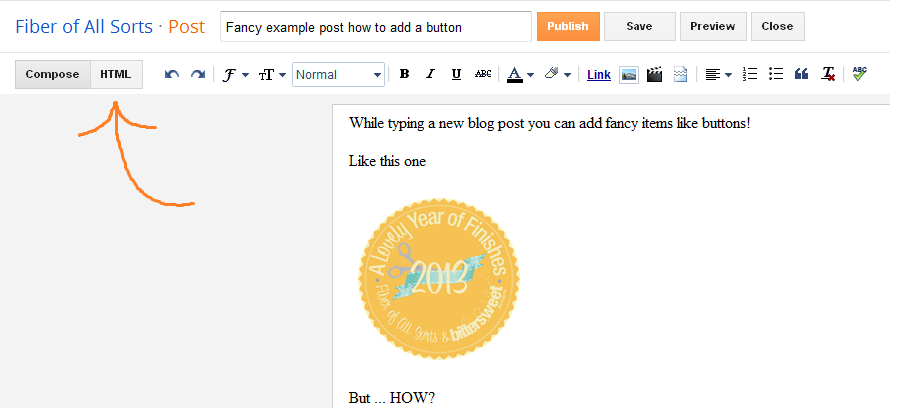
Go to your created blog post and hit the HTML button 


Yep, that one.

You'll be transported into goobly goop world.  Just a precaution, don't delete things while you are in HTML world, it's programming and you can super mess things up if you aren't careful. 

I like to generally find where I'm typing in the post, just so I don't have to move it later, and paste the text from the previous step. I usually use the keyboard shortcuts Ctrl-V.

Then to save your sanity go back to the normal world by hitting the compose button. 

Voila - button {that is if you got the whole text from grab my button box} should be in your post.  Now you can move the button where you wish.

You see that "grab my button" code not only has a pointer to the image but also has a link to a web page that once it's clicked . . it will whisk you to the page associated with it.

There you have it!

Melissa and I will had a tutorial for adding our button to your blog sidebar yesterday, make sure to check that out if you missed it.  

For much more uber cool information about blogger go see Jenelle over at Echinops and Aster.  She's my technical hero with this whole series of awesome information, I still refer to this series monthly!